This post will explain what steps you need to go through to enable the ansible management of RHV on the first release of CFME 4.5. I assume that you’ve already enabled the Embedded Ansible role in Configuration – Server Control (enabling ansible automation inside can take up to 7-10 minutes) .
CloudForms 4.5 comes with the ansible version of 2.2.1. For the RHV / ovirt modules we need the 2.3 version. As both version run python 2.7 an upgrade of the package ansible will not pull in any dependency and will not add any harm to the system.
[root@host204 ~]# rpm -ivh https://dl.fedoraproject.org/pub/epel/7/x86_64/e/epel-release-7-9.noarch.rpm
Then update ansible
[root@host204 ~]# yum update ansible -y
Now we need to get the python-ovirt-engine-sdk4-4.1.3-1.el7ev.x86_64.rpm as this package is not on the cloudforms appliance yet for rhv 4.1. Please make sure you download it from the redhat portal.
[root@host204 ~]# rpm -ivh python-ovirt-engine-sdk4-4.1.3-1.el7ev.x86_64.rpm
Once done you need to create a folder on the CFME 4.5 appliance so that ansible inside can read files on the filesystem. Open the file /etc/tower/settings.py and add the following content
AWX_PROOT_SHOW_PATHS = ['/tmp/readablebytower']
I need this directory for my playbooks as I store the ovirt-ca.pem there which is needed for the authentication.
Restart ansible automation inside to update the configs.
[root@host204 ~]# ansible-tower-service restart
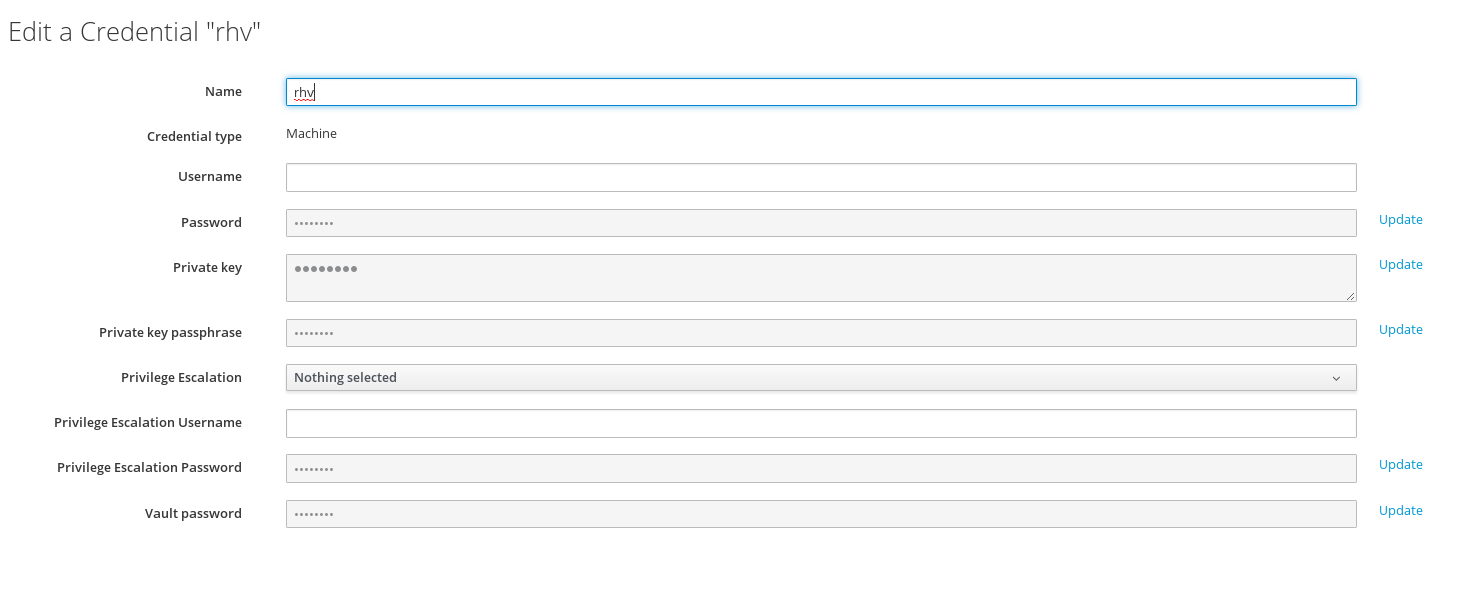
In CloudForms go to Automation – Ansible – Credentials and add the following machine credential. You only need to fill in the Name and Vault password as you will store the RHV creds in the vault. That is the power of ansible. Even if we don’t have the “credentials” in the UI you can pretty much use this method for any provider until we added in the UI:
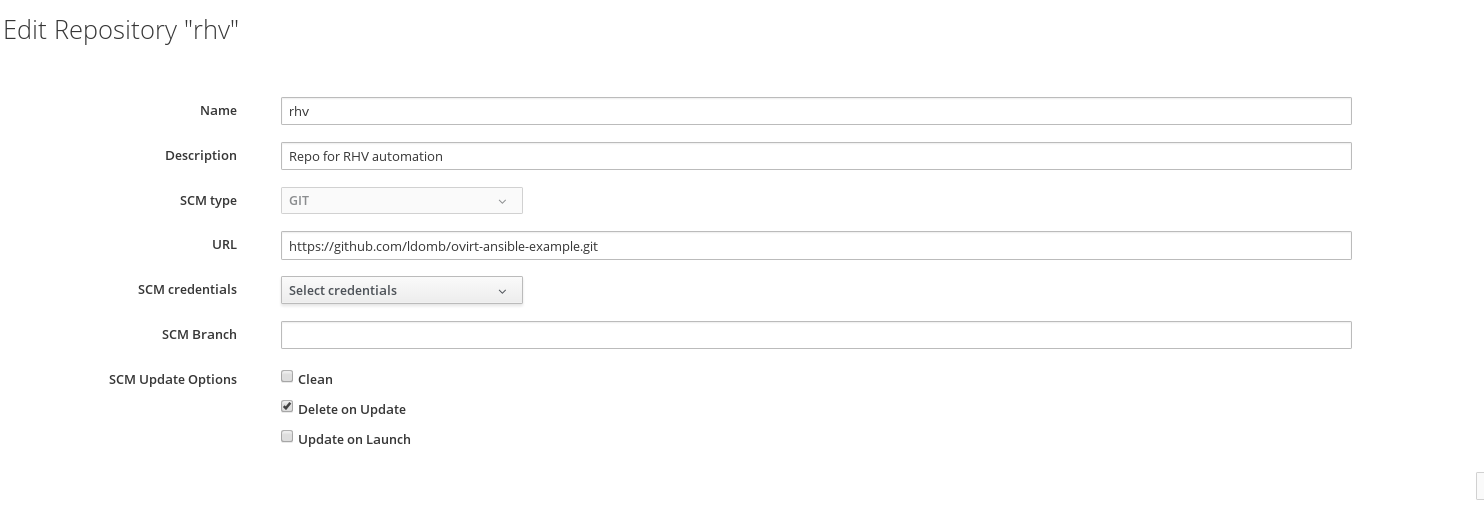
 Then go to Automation – Ansible – Repositories and git clone the following repo (this is for you to get some playbooks) or clone yours:
If you are successful with adding the repo you now see all playbooks under Automation – Ansible – Playbooks:

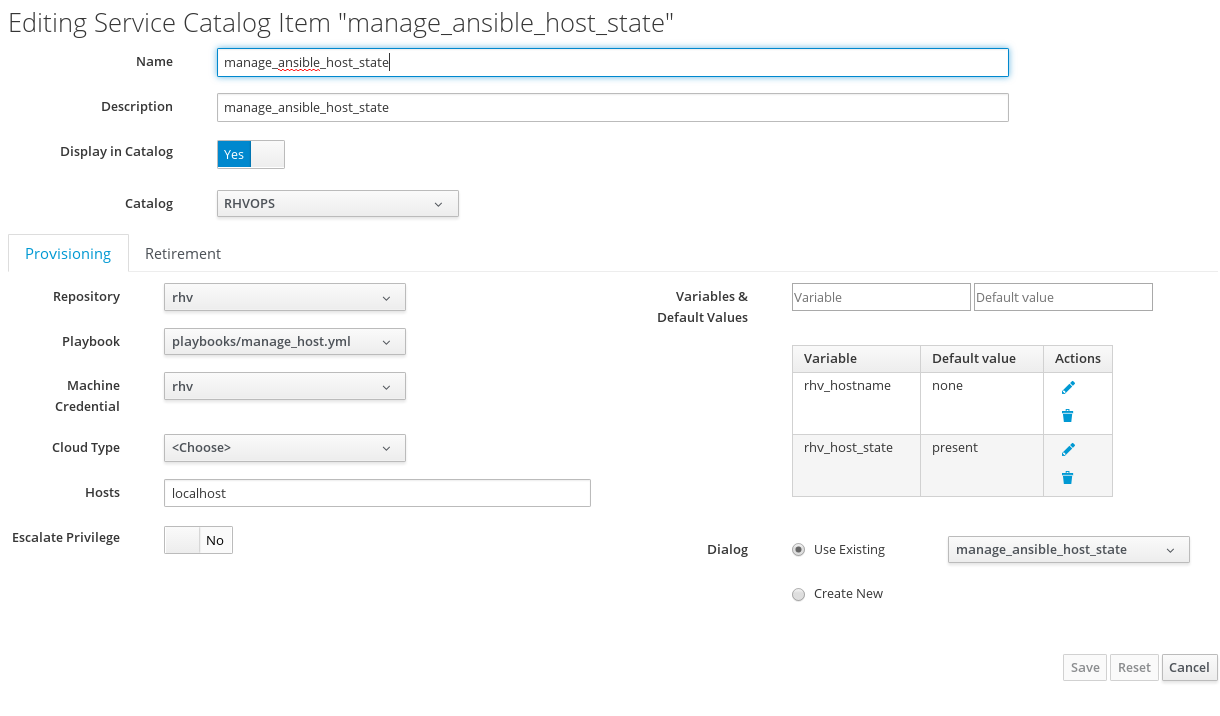
From there you can go to Services – Catalogs and create a new catalog. Once done go to Catalog items where you can choose to create a new item from the ansible playbook. You can either let it generate a new service dialog or you can use one you’ve created.
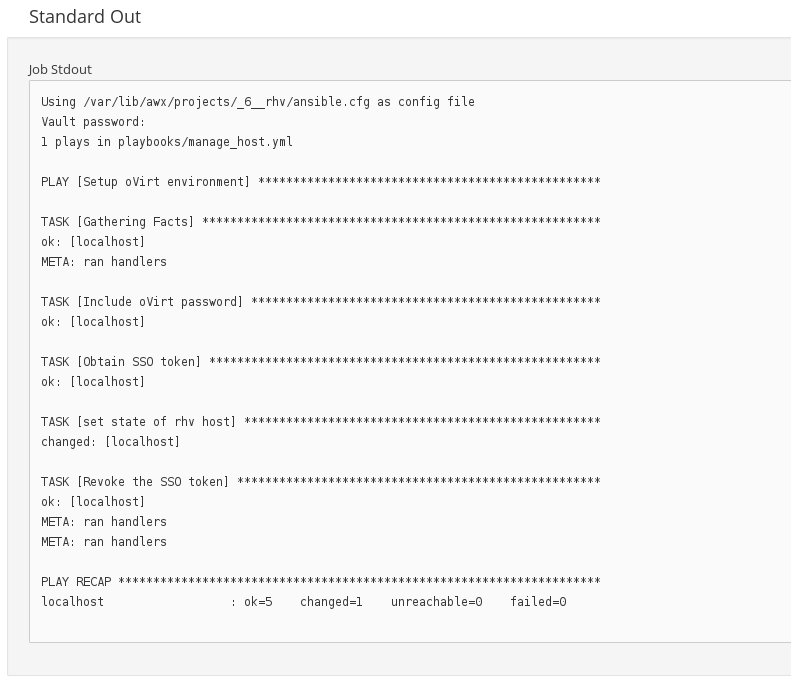
Now that we are done go order the item under Services – Service Catalogs – CatalogName – Item
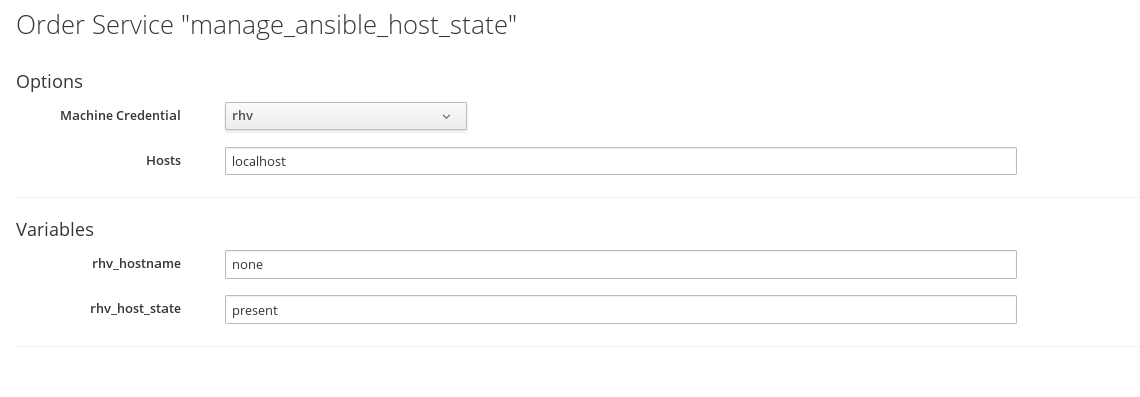
The job output can either be checked in the self service portal or in /var/lib/awx/job_status/…. on the appliance which runs ansbile.