This post will guide you through the configuration for an OpenStack HA cluster setup with public facing admin/public apis. Exposing the OpenStack apis is essential if you want to make use of hybrid cloud management tools like CloudForms.
OpenStack HA is a very complex beast and hard to setup if you don’t have the right tooling. To succeed with the installation, you need to make sure that you plan accordingly for your 3 controller – X compute node setup. You will have to think about things like how do you want to lay out your network, what storage are you going to use for the different services, what type of compute nodes are best for your workloads, etc. etc …
Once you have an idea on how your OpenStack HA architecture should look like, you can use the Red Hat OpenStack Installer which is based on the products theforeman, puppet and staypuft to provision it. A basic HA environment with 3 controllers and 2 compute nodes with publicly accessible api’s takes about 90 to 120 minutes (tested on BL465G6).
One of the challenges which you run into once the OpenStack installer is up and running is to understand what the staypuft plugin does behind the scenes when you move the different tabs into your subnets.
I assume you followed the Red Hat documentation https://access.redhat.com/documentation/en-US/Red_Hat_Enterprise_Linux_OpenStack_Platform/6/html/Installer_and_Foreman_Guide/index.html
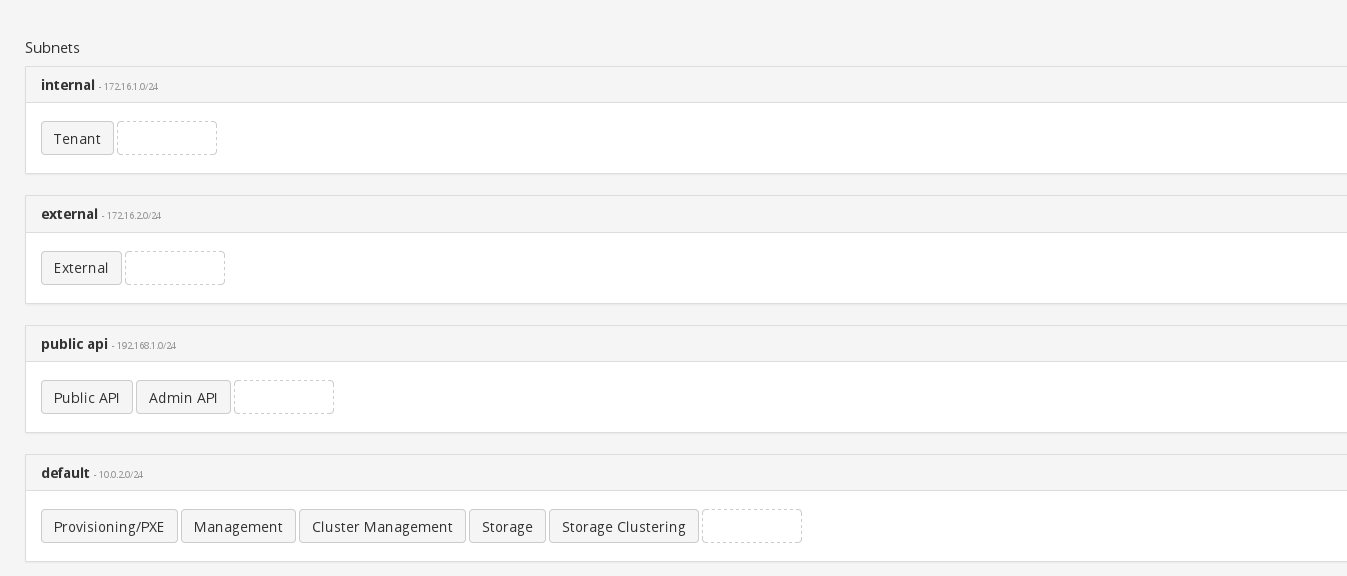
and you’re at the following stage in the installation process:

As you can see you currently have 3 subnets: An external, default and tenant network. If you proceed with the settings as above all your OpenStack api’s/vips will point to the default / isolated provisioning network, meaning that all your endpoints are going to point to the private/isolated network. This is bad as you won’t be able to access your apis from outside the isolated network.
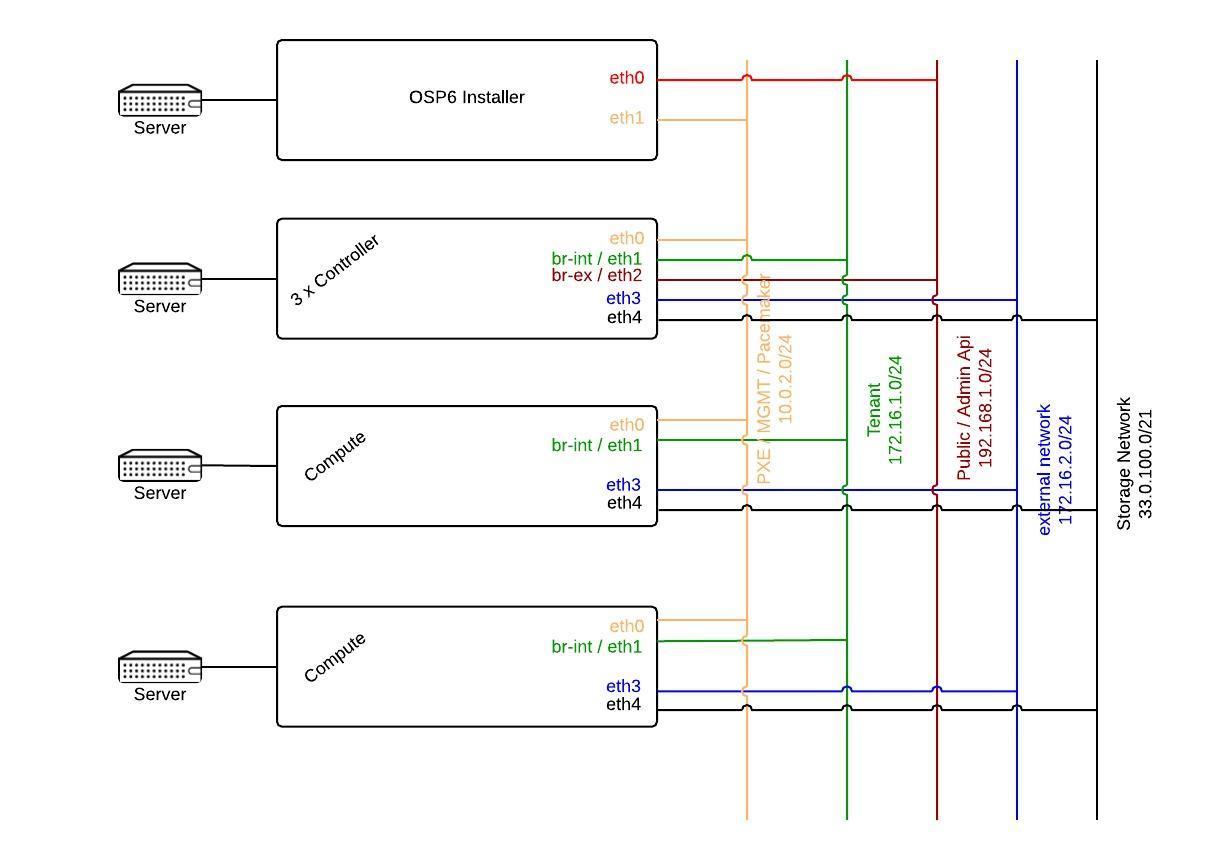
The following diagram will help you to understand how the network for an OpenStack HA environment with public facing api’s could look like.
You can fix the access to the apis by creating a new subnet for your public apis. It is very important to understand what the osp installer triggers when you choose to separate the public/admin api from the default subnet. Below find an extract of the ruby method.
subnet_typings_controller.rb of the https://github.com/theforeman/staypuft project

Your public api network must have a default gateway. Didn’t we have an external network in the diagram above with a default gateway? So what is that external network for if we can’t use it to expose the apis?
The external network is not meant to be the network which exposes your public/admin OpenStack apis. The term external network in the realm of the OpenStack installer means that its used for connectivity/bridges (br-ex) for the running instances.
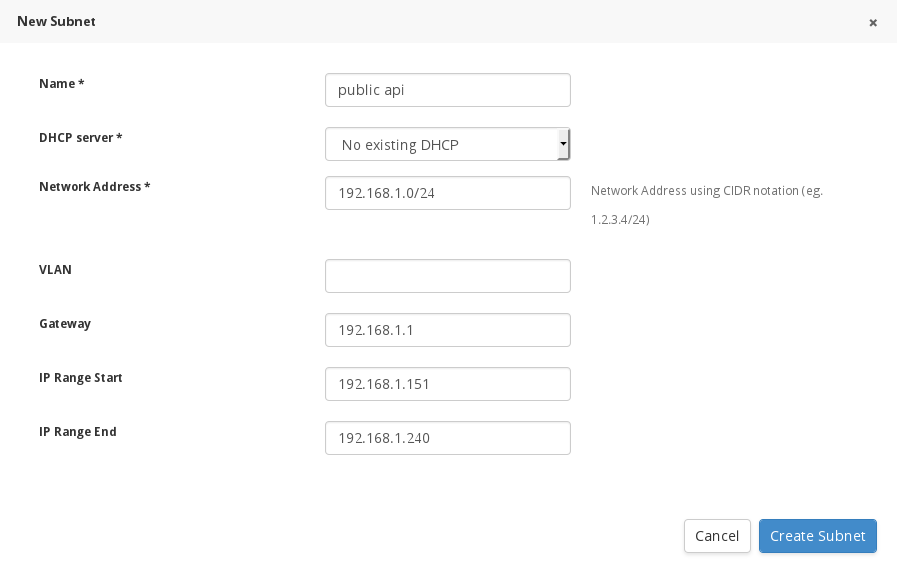
If you want to expose the public and admin api’s you need to create a new subnet which is on a routeable network. Click on the “New Subnet” button and create a new public api subnet. Remember that the start and stop range you provide will be used for the public vips used by pacemaker ( So public/admin vips).
Once done, assign your networks to the correct subnets. In the current setup I am not using a separate subnet for storage. In a production environment you should be using one.
Now that you have chosen in what subnets your services will reside, it’s time to look behind the scenes and explore what exactly happens when you place the public/admin api tab into your newly created public api subnet.
The Public api sets up access to the OpenStack public REST API. It overrides the following parameters (smart class variables) in the controller module which you can find in the advanced configurations tab:
* Ceilometer public vip
* Cinder public vip
* Glance public vip
* Heat public vip
* Heat cfn public vip
* Horizon public vip (to access OpenStack admin interface)
* Keystone public vip
* Loadbalancer vip
* Neutron public vip
* Nova public vip (essential as this is connected with the nova_host variable which sets the novncproxy url in nova.conf)
* Swift public vip
Some applications like CloudForms need to be able to access the admin REST API via public interface. By moving the admin tab into the public api subnet we override these additional controller smart class parameters:
* Ceilometer admin vip
* Glance admin vip
* Heat admin vip
* Heat cfn admin vip
* Horizon admin vip
* Keystone admin vip
* Neutron admin vip
* Nova admin vip
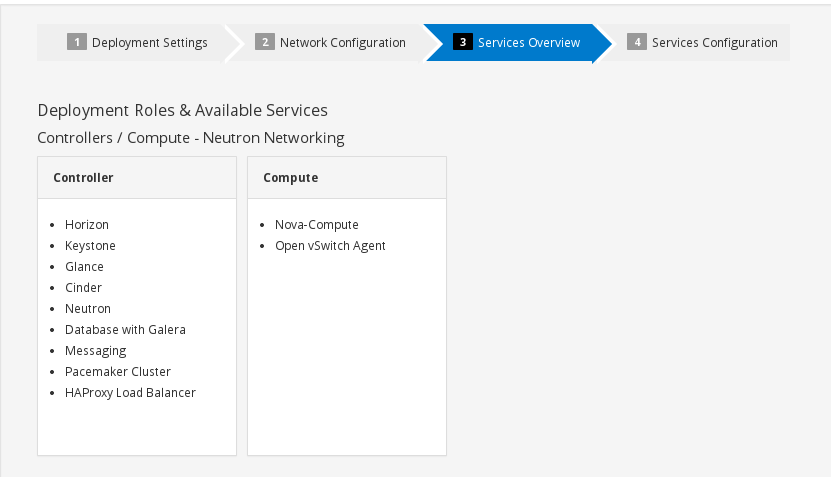
I assume that you now have everything in place from a networking perspective and you pressed the next button. The installer will send you to the following page which shows you what components will get installed on controller and compute. Click next …
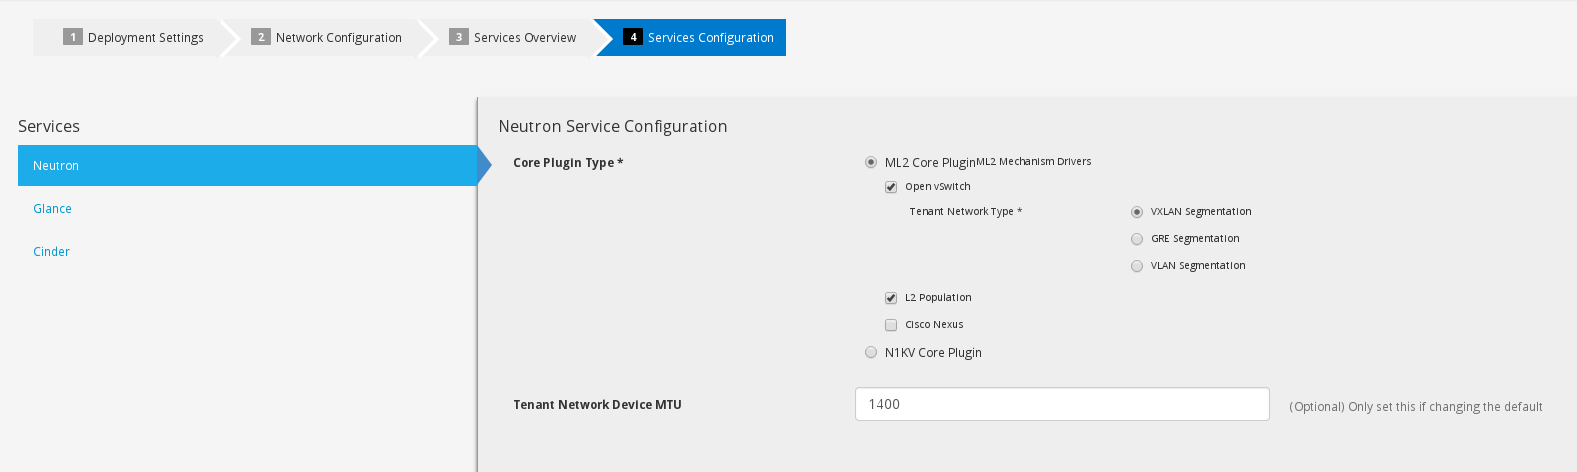
The next step will give you the opportunity to set your core plugins for networking as well as cinder/glance configurations. There was a bug in correlation with vxlan and mtu size in Icehouse which got fixed in Juno. If for whatever reason you would like to specify a default mtu size for your instances you can set it here. Once done with your configuration click next.
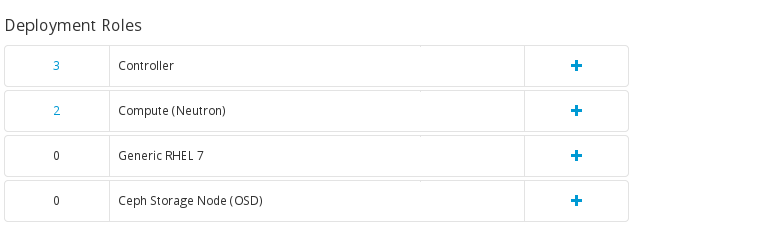
The next steps are CRITICAL for a successful HA deployment. You will have to assign the the nodes to the roles and place them into the correct subnets. Click the plus sign and add your hosts to the specific roles
 Once your done adding the hosts you need to CONFIGURE the networks. Make sure you don’t rush this.
You are going to be presented with something like this if you added your controller nodes.
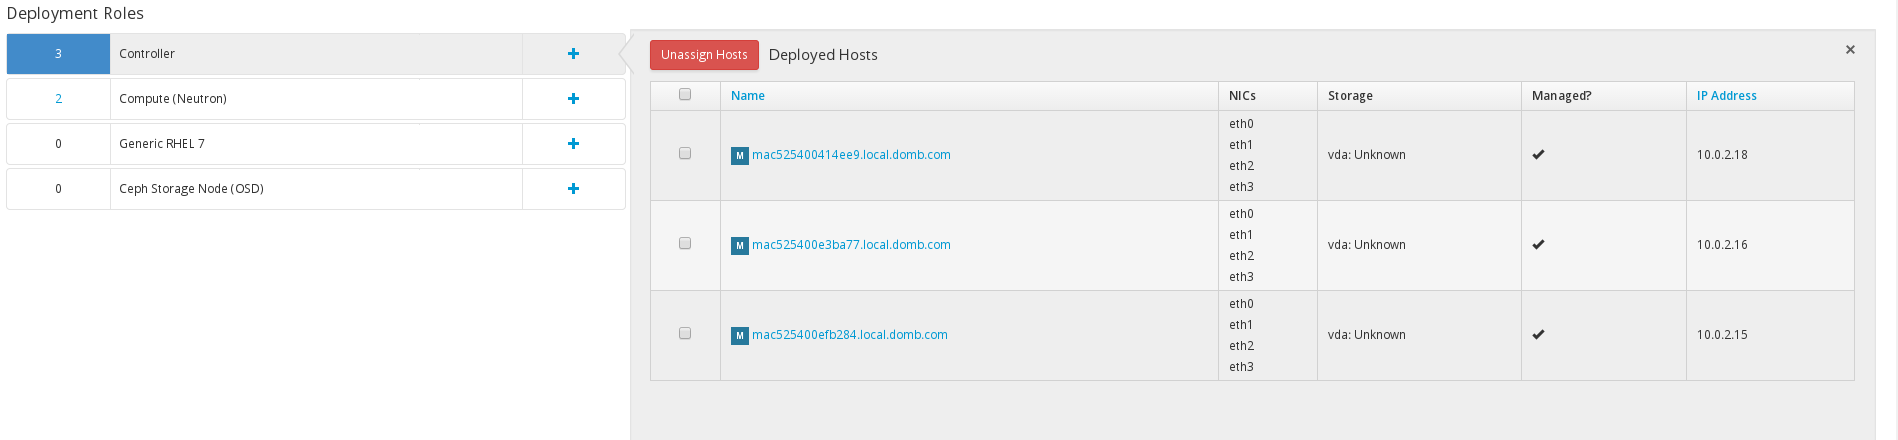
Click on each controller host and configure the following networks:
* default network (must be the first interface)
* tenant network
* public api network
* external network
The order for tenant, public api, external network, storage, etc is irrelevant.
Your configuration could look something like this:

Do the same for your compute nodes. (Note: you are not going to see br_int, br_tun, ovs_system virbr0_nic until your installation is done)
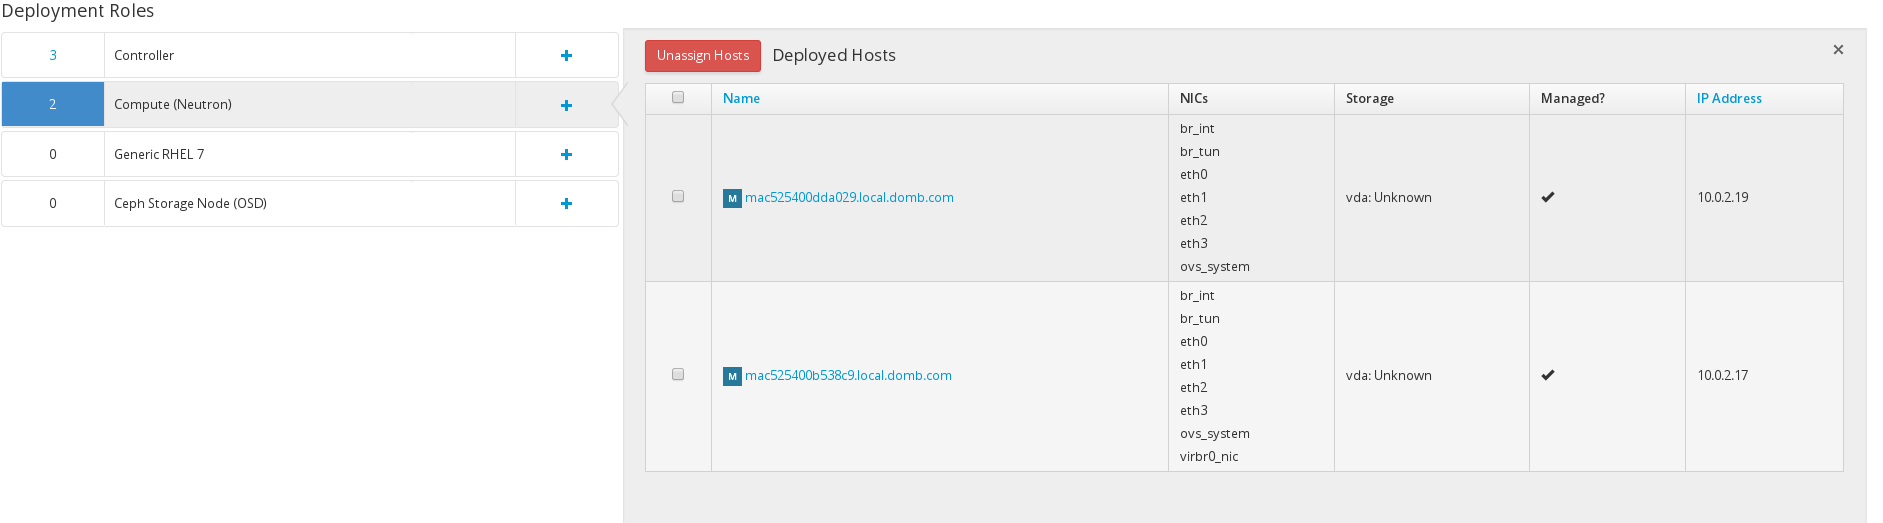
The reason why I am using the external network for the compute nodes is because I will be using DVR in my setup. DVR enables east west traffic via virtual router on the compute node and also handles north south traffic for your instances floating ip’s.
Once you configured all your networks click on the advanced configuration tab, and click edit. You have to override two values in the neutron puppet module.
 Click on neutron module on the left and add the value “br-ex” to the empty field in “External network bridge.” Additionally, you need to scroll down to the “Ovs tunnel iface” and override the whole string with eth1 (because my tenant network is there).
Ok, now that your done configuring your system you can click deploy and get a coffee.
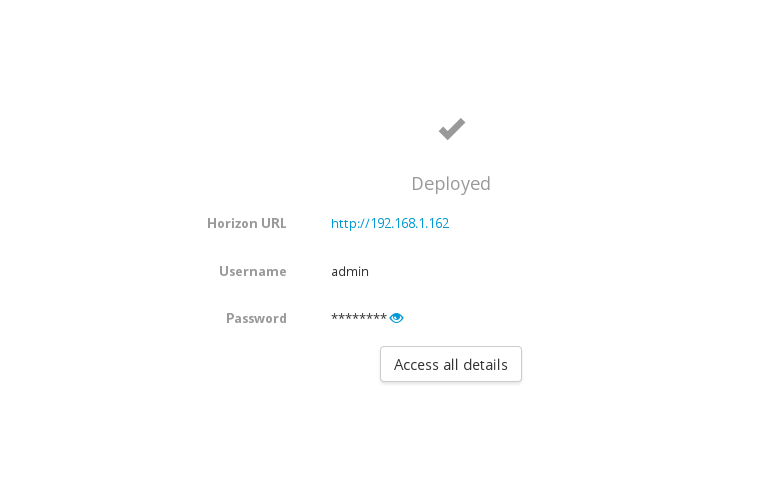
After your installation is complete you’re going to see the following screen:
Lets go and verify that the Red Hat OpenStack Installer configured the system correctly. Login to your controller source the keystone_adminrc. Run keystone endpoint-list:
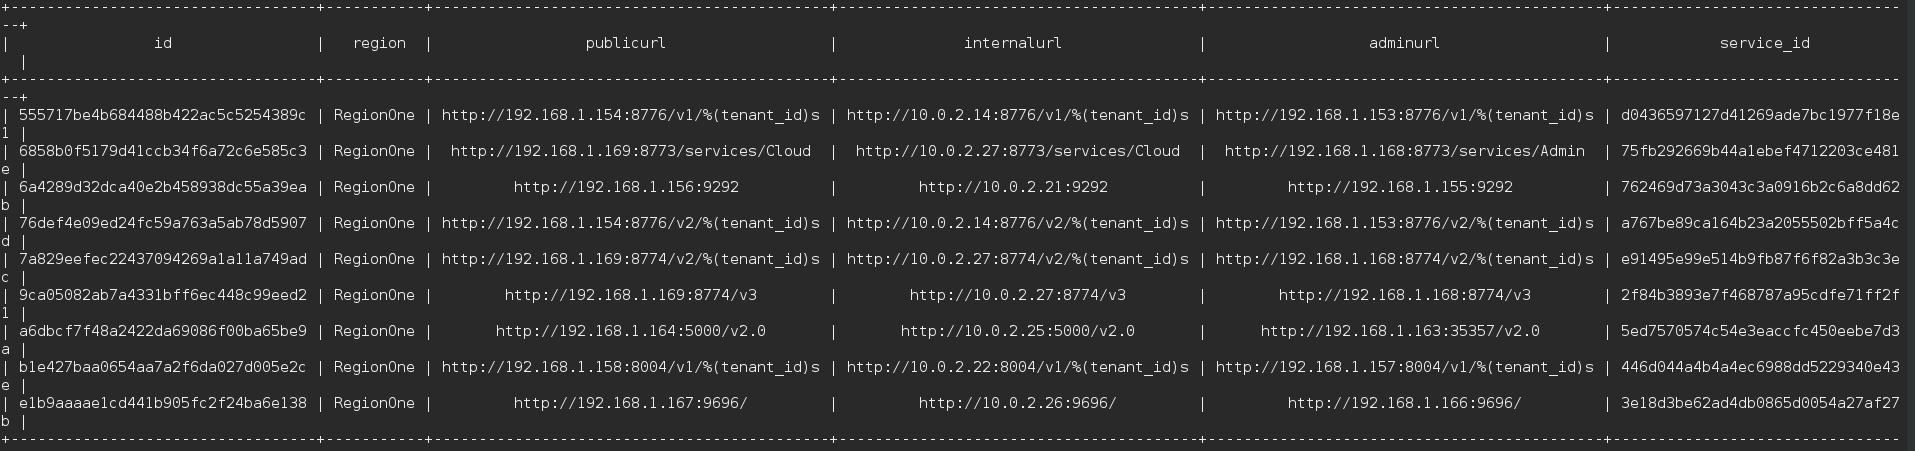
As you can see our public and admin url are on the correct subnet. Lets make sure that the vips for pacemaker were created correctly. Run pcs status | grep pub

Nice, all the vips have public ip’s. Remember the default route change from external to the public api network? Run route to see if that’s correct.
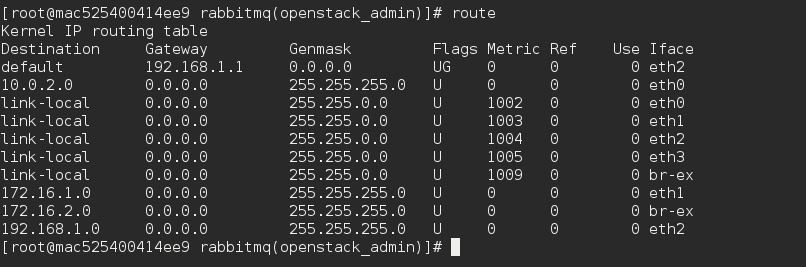
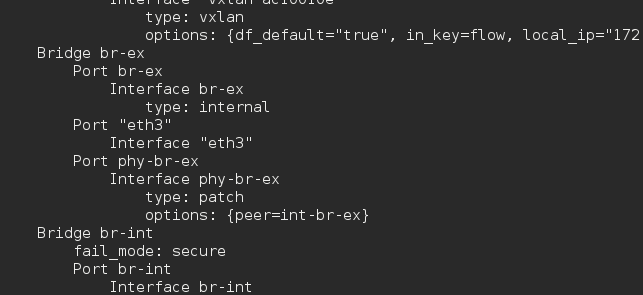
As expected we see that the default getaway was set on the public api subnet. This means that my br-ex will be plugged in to my eth3/external subnet which you can see by running ovs-vsctl show.
Next we need to check if the cluster is healthy. You can do this with pcs status.
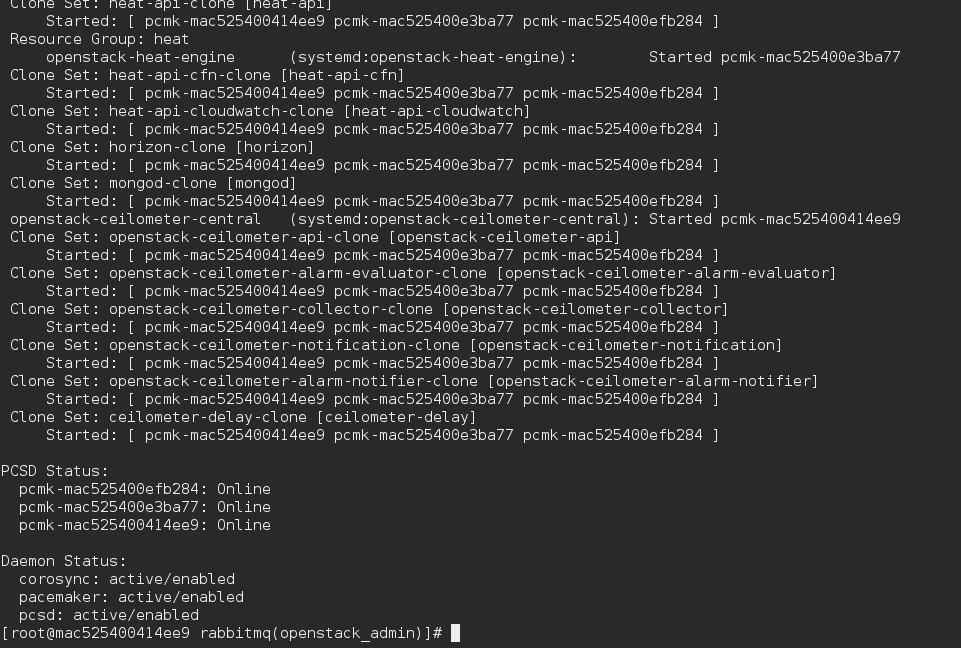
As you can see my 3 controllers are online and I have no failures in the resources. Last but not least (in my setup I choose to use nfs ) I have to check if cinder and glance got mounted correctly. Type mount

The nfs volumes for Glance and Cinder are both mounted. So we are almost ready to go.
If you want to connect CloudForms with OpenStack you need an admin user which is part of the tenant (admin) and has a role admin. It also needs to be admin for the services project/tenant. Lets create the CloudForms user for the OpenStack provider. Source your keystone_adminrc
[root@mac525400efb284 ~(openstack_admin)]# keystone tenant-list
+----------------------------------+----------+---------+
|                id                |   name   | enabled |
+----------------------------------+----------+---------+
| 2bfd94a4c1b544b39d224f2a94901e66 |  admin   |   True  |
| a7777076e3324b33948205d731f9d030 |   blue   |   True  |
| 2892bbb62e474f32a0fa3255a6d812e4 |   red    |   True  |
| 465e99d053b34ddebde3897cb4f1987b | services |   True  |
+----------------------------------+----------+---------+
Create the CloudForms user
[root@mac525400efb284 ~(openstack_admin)]# keystone user-create --name cloudforms --tenant-id 2bfd94a4c1b544b39d224f2a94901e66 --pass redhatrocks --email ilove@open.stack --enable true
+----------+----------------------------------+
| Property |              Value               |
+----------+----------------------------------+
|  email   |         ilove@open.stack         |
| enabled  |               True               |
|    id    | c24c5c2472274a2db6f9bbb30f9edb37 |
|   name   |            cloudforms            |
| tenantId | 2bfd94a4c1b544b39d224f2a94901e66 |
| username |            cloudforms            |
+----------+----------------------------------+
List the Keystone Roles and users
[root@mac525400efb284 ~(openstack_admin)]# keystone role-list
+----------------------------------+------------------+
|                id                |       name       |
+----------------------------------+------------------+
| 9fe2ff9ee4384b1894a90878d3e92bab |     _member_     |
| c892bd2dbda84abe9d60ab6d9201247b |      admin       |
| 064cda4f78c84eaeae076f0e1c25ea2c | heat_stack_owner |
| f19f526d30724eed844683b6a8271162 | heat_stack_user  |
+----------------------------------+------------------+
[root@mac525400efb284 ~(openstack_admin)]# keystone user-list
+----------------------------------+------------+---------+----------------------+
|                id                |    name    | enabled |        email         |
+----------------------------------+------------+---------+----------------------+
| 0f46f03997224f6a96514fac7754cc87 |   admin    |   True  | admin@local.domb.com |
| 59db049f99bf4f84ab4f368d21e5461d |   cinder   |   True  |   cinder@localhost   |
| c24c5c2472274a2db6f9bbb30f9edb37 | cloudforms |   True  |   laurent@domb.net   |
| 4023b1b6ae5f447b902843fe97b902c2 |   glance   |   True  |   glance@localhost   |
| 6527504f789f4493800949b03bacf60d |    heat    |   True  |    heat@localhost    |
| b9b2e08d02774162b9820b9e11fcc7ca |  neutron   |   True  |  neutron@localhost   |
| bb189b4ad8e64dd9af16ace81a8c19c5 |    nova    |   True  |    nova@localhost    |
+----------------------------------+------------+---------+----------------------+
Add the correct role tenant id to your user
[root@mac525400efb284 ~(openstack_admin)]# keystone user-role-add --user c24c5c2472274a2db6f9bbb30f9edb37 --role c892bd2dbda84abe9d60ab6d9201247b --tenant-id 2bfd94a4c1b544b39d224f2a94901e66
Add the cloudforms user to the services tenant
[root@mac525400efb284 ~(openstack_cloudforms)]# keystone user-role-add --user cloudforms --tenant services --role admin
We are now ready to connect CloudForms to the keystone public vip:5000. You will also need the amqp user and password “Amqp username”/”Amqp password” (“openstack/redhat”) which can be found in the controller class (this can be overridden).
Login to the CloudForms appliance and click on the Cloud -> Providers tab. Under the Cloud -> Provider tab click -> Configuration -> Add new Cloud Provider. 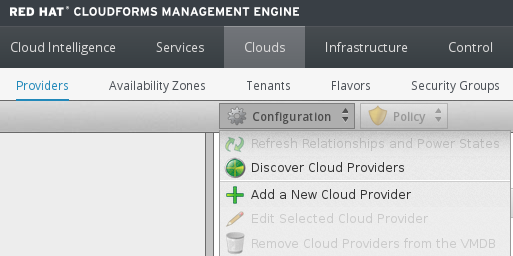 Enter the following information
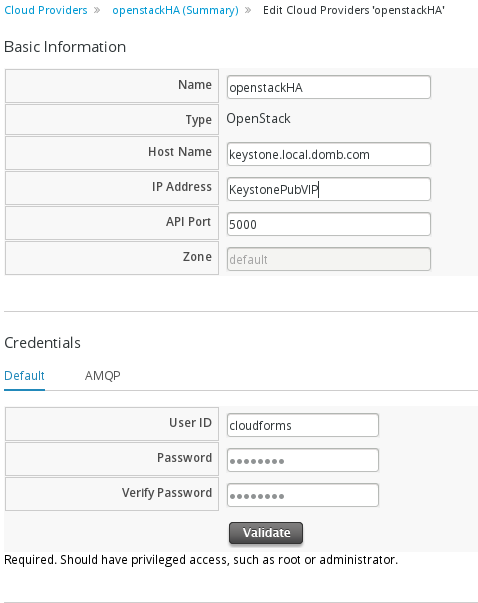
Click validate. If you get an ok back enter the AMQP user and password
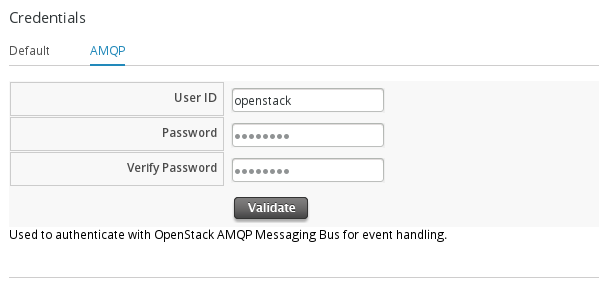 and click validate and save.
That’s it, you’re done! You can now use CloudForms to manage your OpenStack HA environment.
Note: If you add a new tenant to your OpenStack environment and want CloudForms to manage it you will need to add the CloudForms user as admin to that tenant.