Ever wondered how you could run ansible tower in clustered mode across multiple AZ in AWS? This post will describe how you can build the following architecture:
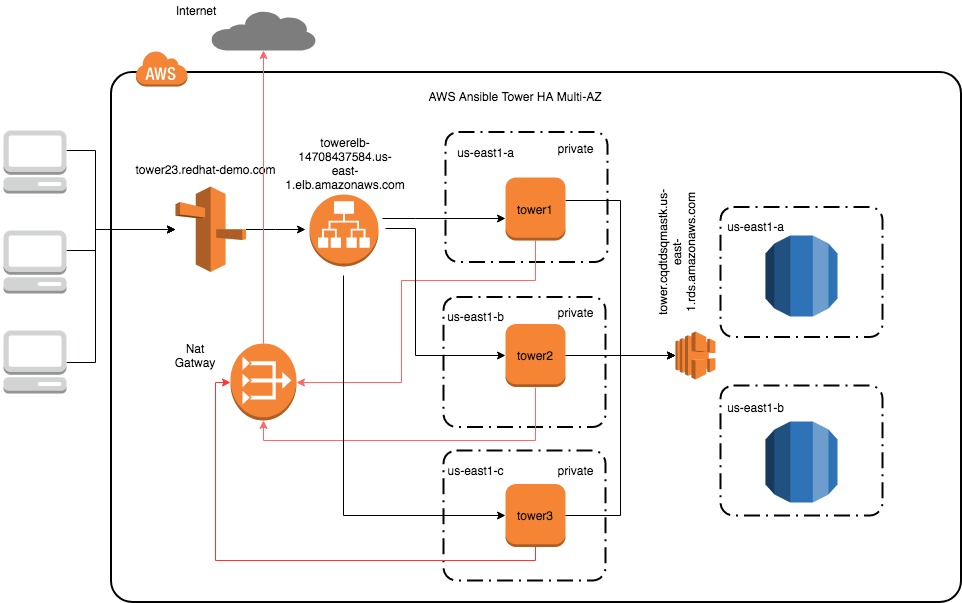
First, build 3 ec2 instances each in a different AZ’s. You should be more than ok with t2.large instance sizes. The subnets in the VPC can be private. If you have a private VPC make sure you have a nat gateway so that the instance can talk to the internet.

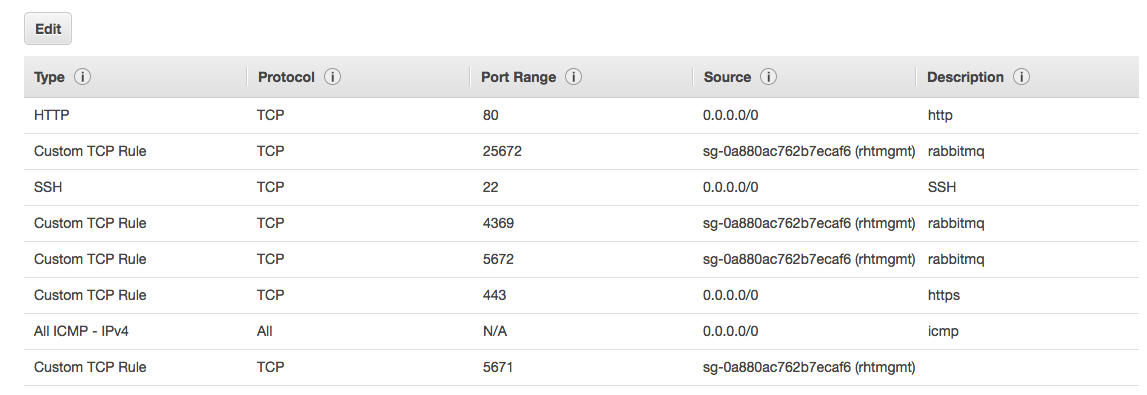
Then make sure you are adding the correct security group (sg) settings to the instances
Once you have the security groups attached to the ec2 instances you can go ahead to the RDS tab and create the postrges 9.4 database. Choose production and multi-az. If you filled out everything correctly you should see something like

The connection string can be found all the way on the bottom of the page
tower.cqdtdsqmastk.us-east-1.rds.amazonaws.com
Also, make sure that your instance has the RDS SG attached so it can talk to the database.
Next login into your main ansible tower node and download the latest tower
[ec2-user@ip-10-0-1-247 ~]$ wget http://releases.ansible.com/ansible-tower/setup-bundle/ansible-tower-setup-bundle-latest.el7.tar.gz
Untar the directory and cd into it
[ec2-user@ip-10-0-1-247 ~]$ tar -xzvf ansible-tower-setup-bundle-latest.el7.tar.gz && cd ~/ansible-tower-setup-bundle-3.2.3-1.el7
Next, edit the inventory file
[ec2-user@ip-10-0-1-247 ~]$ cat inventory

[tower]
ip-10-0-1-247.ec2.internal ansible_user=ec2-user ansible_ssh_private_key_file=/home/ec2-user/ansible-tower-setup-bundle-3.2.3-1.el7/ansible.pem
ip-10-0-2-222.ec2.internal ansible_user=ec2-user ansible_ssh_private_key_file=/home/ec2-user/ansible-tower-setup-bundle-3.2.3-1.el7/ansible.pem
ip-10-0-3-210.ec2.internal ansible_user=ec2-user ansible_ssh_private_key_file=/home/ec2-user/ansible-tower-setup-bundle-3.2.3-1.el7/ansible.pem


[instance_group_east_b_c]

ip-10-0-2-222.ec2.internal
ip-10-0-3-210.ec2.internal

[instance_group_east_a_c]
ip-10-0-1-247.ec2.internal
ip-10-0-3-210.ec2.internal

[database]
[all:vars]

admin_password='opensource2018'
pg_host='tower.cqdtdsqmastk.us-east-1.rds.amazonaws.com'
pg_port='5432'
pg_database='awx'
pg_username='awx'
pg_password='opensource2018'

rabbitmq_port=5672
rabbitmq_vhost=tower
rabbitmq_username=tower
rabbitmq_password='opensource2018'
rabbitmq_cookie=cookiemonster
# Needs to be true for fqdns and ip addresses

rabbitmq_use_long_name=true # IMPORTANT
# Isolated Tower nodes automatically generate an RSA key for authentication;
# To disable this behavior, set this value to false
# isolated_key_generation=true
As you are in AWS you will need to enable the following 2 repos
[ec2-user@ip-10-0-1-247 ~]$ yum-config-manager --enable rhui-REGION-rhel-server-extras &&yum-config-manager --enable rhui-REGION-rhel-server-optional
Install ansible
[ec2-user@ip-10-0-1-247 ~]$ yum install ansible -y
Once finished launch the installation
[ec2-user@ip-10-0-1-247 ~]$ ANSIBLE_BECOME=True ./setup.sh
If the installation is successful you should no be able to login to one of the tower hosts via its public fqdn assigned by AWS.
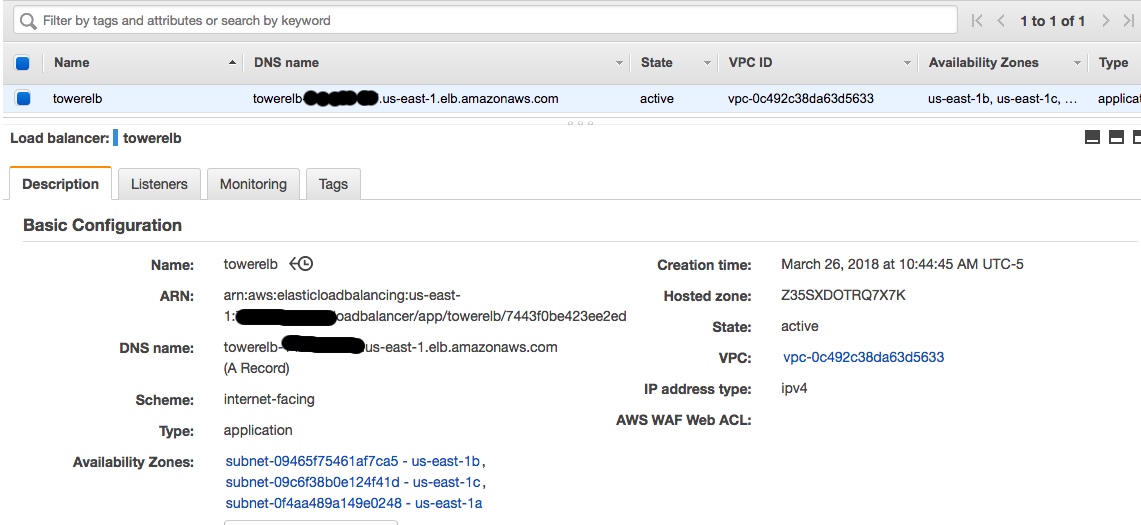
As we want to have a single entry point to the cluster we front end it with an ALB ( you will also need to have Route53 setup correctly for this to work) Go ahead and create the ELB. The cert and key for SSL can be found in /etc/tower. Make sure you upload the cert when creating the ALB. You also see that it spans across the 3 AZ’s.
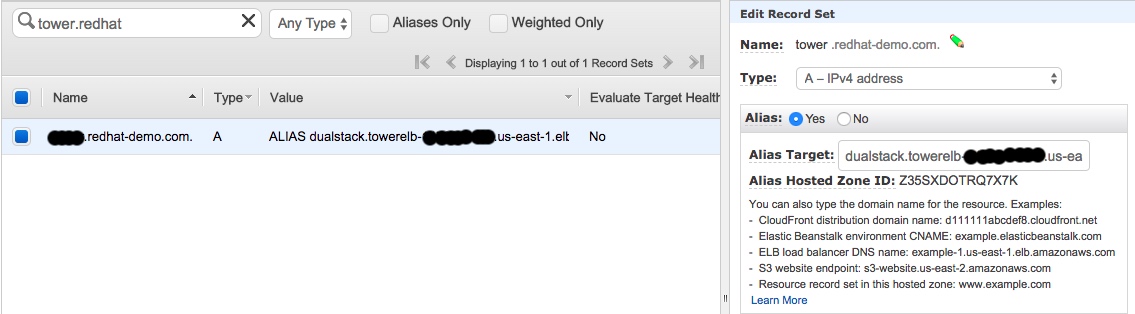
Lastly, create an alias in route53 pointing to the ALB.
It will take a few minutes until the alias is available. Log in into your Tower instance
You can then go to configuration instance groups to validate your config
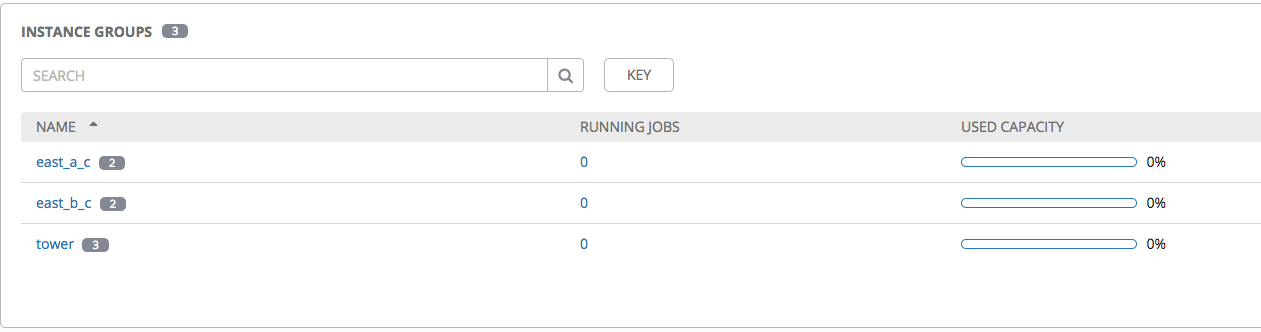
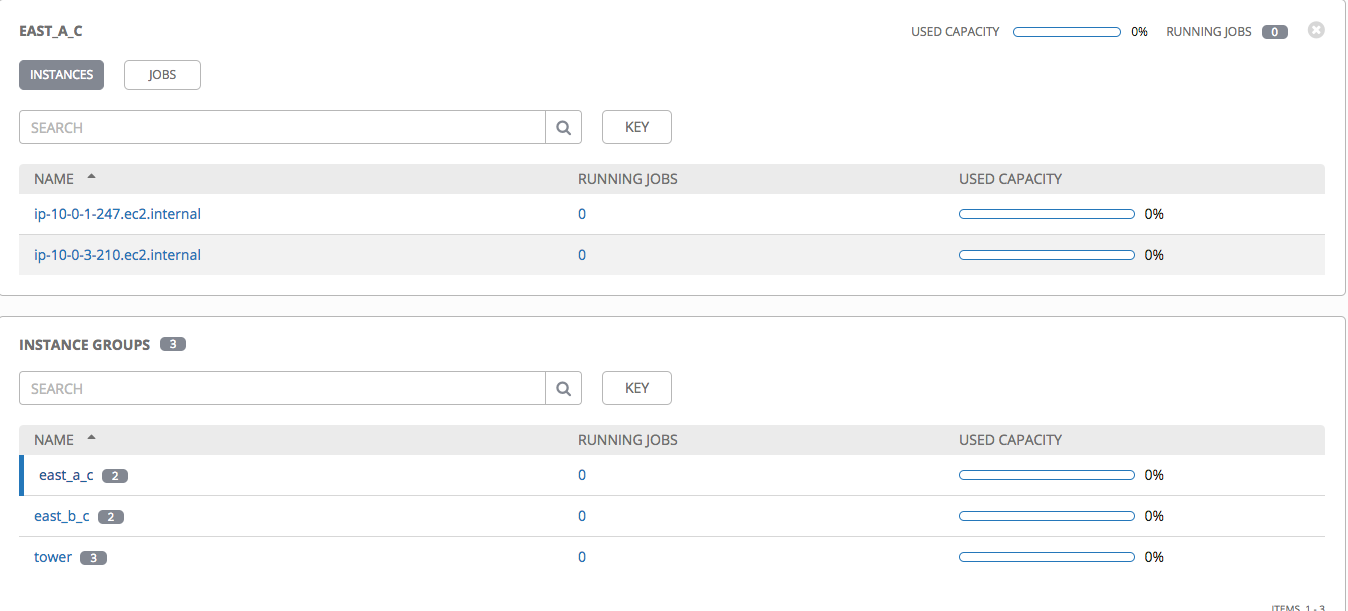
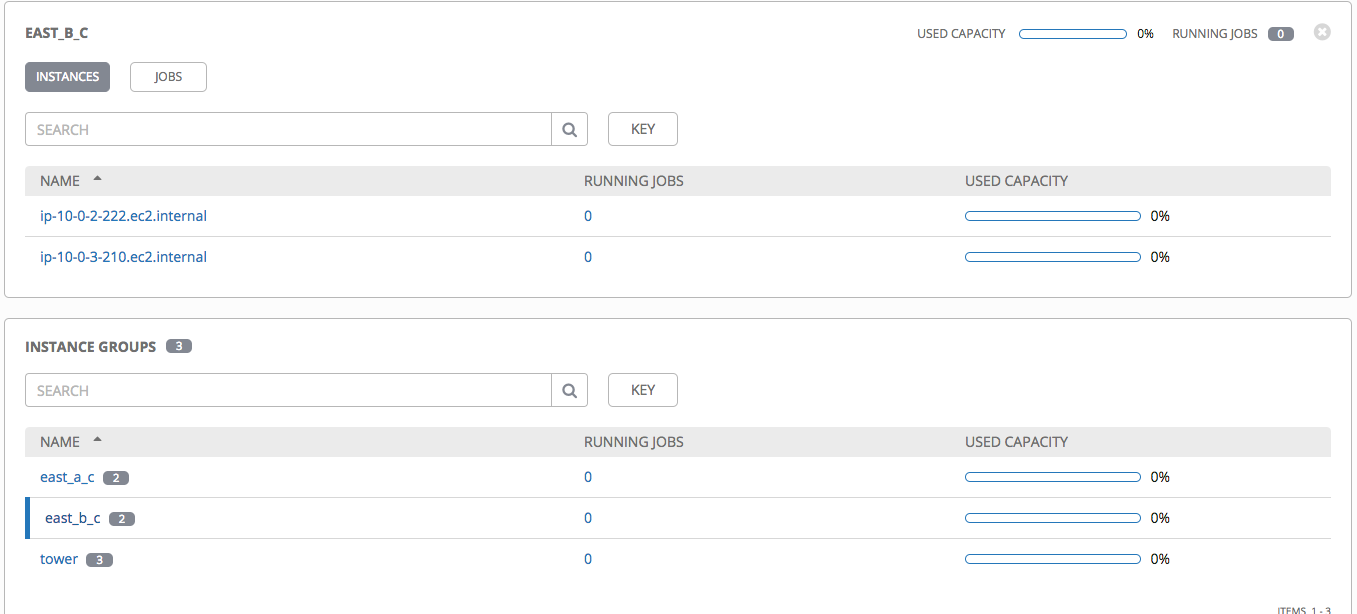
Congratulations if you read until here. You now have a fully HA Tower installation with AWS managed ELB and RDS.